

Table of Contents
- Step 1: Measure Your Space and Check Floor Load Capacity
- Step 2: Define Fitness Goals Before You Buy a Single Plate
- Step 3: Choose Gym-Grade Equipment Built to Last
- Step 4: Install Home Gym Flooring for Heavy Weights
- Step 5: Plan Your Home Gym Cost and Budget for the Long Term
- Step 6: Build a Home Gym Equipment Maintenance Schedule
- Step 7: Anchor, Install, and Set Safe Clearances
- Common Mistakes That Shorten Equipment Lifespan
- Frequently Asked Questions
Last Updated: October 17, 2026
Step 1: Measure Your Space and Check Floor Load Capacity
Building a durable home gym starts with numbers, not shopping. Before you buy a rack or plate, measure your room and understand what your floor can carry. This guide walks through the seven steps that separate a gym that lasts from one that sags, cracks, or rusts.
Buying equipment first and fitting the room around it costs money. Measure first to avoid returns, cramped layouts, and dangerous clearances.
Room Dimensions, Ceiling Height, and Clearance
Grab a tape measure and write down four numbers: length, width, ceiling height, and door width. Ceiling height matters more than most people expect. An overhead press needs room above your head, and a power rack needs space for the pull-up bar.
Check clearances around each wall. You need room to load plates, step back from a rack, and swing a barbell without hitting anything.
Floor Load Capacity and Structural Limits
Floor load capacity is the maximum weight a floor can safely support per square foot. This is the number nobody checks, and it is the one that matters most.
Concrete slabs in a garage or basement handle heavy loads well. Upper floors in older wood-frame homes flex under a loaded rack and a lifter. If you are unsure, ask a structural engineer before installing anything heavy, that conversation costs far less than a repair.
Step 2: Define Fitness Goals Before You Buy a Single Plate
Your goals decide your equipment list. A lifter chasing strength needs a barbell, plates, and a rack. Someone focused on resistance training and mobility may get more from dumbbells, bands, and a bench.
Answer three questions before you spend:
- What are my main workout activities? (strength training, cardio, mobility, or a mix)
- How many people will use the space, and how often?
- Will clients or training partners use it, or just me?
Write the answers down. Every purchase should trace back to them, this keeps your budget honest and stops you buying gear you will never touch.
Step 3: Choose Gym-Grade Equipment Built to Last
Durability is where cheap equipment shows its age. A budget rack may hold weight on day one, but steel gauge, weld quality, and finish decide whether it still feels solid in year five. This section goes category by category so you can compare construction, load ratings, wear points, and warranty terms before you buy.
Durability Criteria by Equipment Category
Here is what to check before you buy, category by category:
- Racks and benches: Look at steel tube thickness and weld quality. Thicker gauge steel resists flex. A bench should feel rock solid with no side-to-side wobble. Check the rack's stated weight capacity and confirm it is rated well above your working weight plus body weight. Inspect the J-cups and safety arms for wear points, these are the parts that fail first. A good warranty covers the frame for years, not months.
- Barbells: Check tensile strength and how the sleeves rotate. Needle bearings spin smoother under load than bronze bushings. A bent bar is a permanent problem, so buy a bar rated well above your working weight. Look at the knurling and finish: chrome can chip, while bare steel or cerakote holds up better over time. The sleeve assembly is the main wear point, ask whether replacement sleeves or bearings are available.
- Weight plates: Rubber bumper plates protect floors and survive drops. Cast iron lasts but chips and cracks concrete if dropped. Check the plate's durometer (hardness) and whether the insert is stainless steel or brass, a cheap insert wears and the plate wobbles on the sleeve. For cast iron, look at the hub design and whether the plates are machined or cast.
Load Ratings and Wear Points
Every piece of equipment has a stated load rating, and that number matters more than the marketing copy. A rack rated for 500 pounds is not the same as one rated for 1,000, even if they look similar.
Wear points are the parts that move, bear load, or take impact: J-cups, safety arms, and pull-up bar mounts on a rack; sleeves and bearings on a bar; the pad and hinge on a bench.
Space Requirements for a Home Gym Power Rack
A power rack needs more room than its footprint suggests. Plan for rack depth, bar length, loading space on each side, and a step-back zone in front.
A standard barbell is about seven feet long, so the rack needs a wide wall or a corner with open floor on both sides. Measure your bar and add clearance before committing to a spot.
Step 4: Install Home Gym Flooring for Heavy Weights
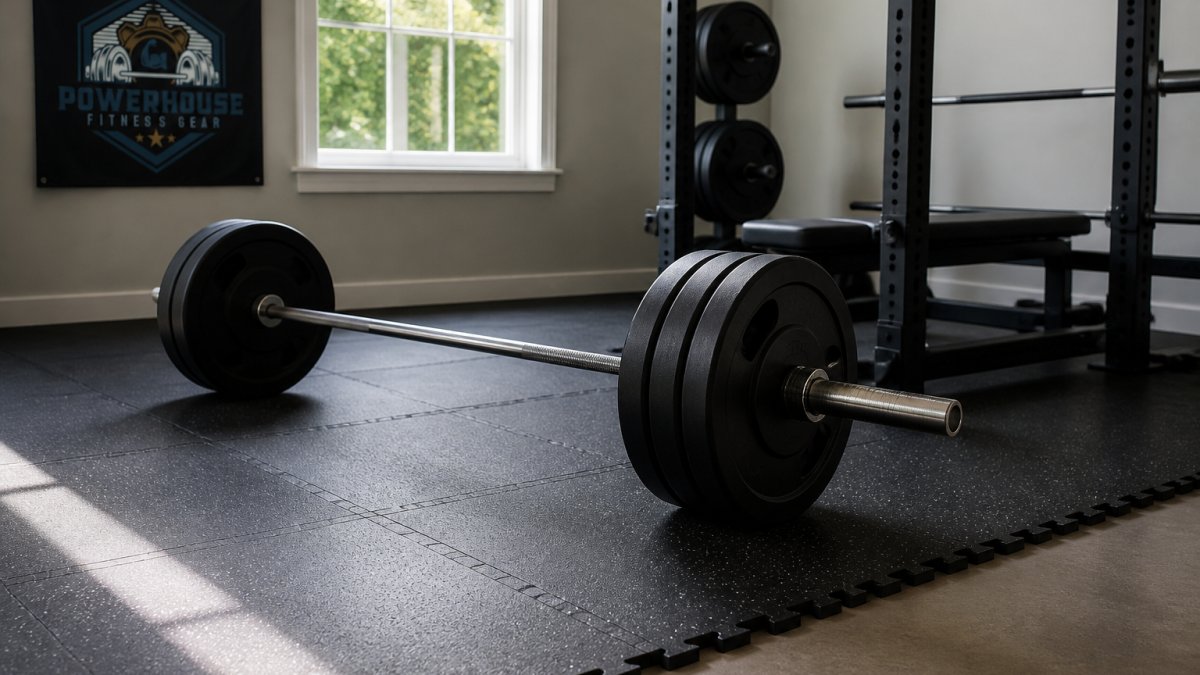
Home gym flooring for heavy weights protects two things: your floor and your equipment. Rubber is the standard choice because it absorbs impact and cuts noise, but the right material depends on how you train and what is underneath.
Durable Flooring by Use Case
Match the flooring to how you train:
- Olympic lifting and dropped barbells: Thick rubber horse-stall mats or interlocking rubber tiles, at least three-quarters of an inch thick. These absorb impact and protect the subfloor from dropped loads. Check that the tiles interlock tightly, loose seams catch plates and create trip hazards.
- General strength training: Rubber rolls or tiles around a half inch thick work well under a rack and bench. This thickness handles dropped dumbbells and steady foot traffic without compressing under the rack feet.
- Cardio and bodyweight work: Interlocking foam or thinner rubber is enough and easier on the feet. Foam is lighter and cheaper but tears under heavy equipment, so keep it away from racks and plates.
Flooring Comparison by Material
- Rubber rolls and tiles: Best all-around choice for impact and noise. Rubber holds up to dropped weights, cleans easily with a damp mop, and grips well even when sweaty. It is heavy and can be hard to cut, and some rubber has a strong odor when new. Compatible with concrete and wood subfloors, but check for moisture before installing over concrete.
- Horse-stall mats: Thick, dense, and affordable per square foot. They absorb impact well and are easy to replace individually. They can be heavy and awkward to move, and seams may collect debris. Best over concrete in garages and basements.
- Foam puzzle mats: Cheap, light, and comfortable for bodyweight work. They compress and tear under loaded racks and dropped weights, so they are not a durable choice for strength training. Use them for stretching or cardio only.
Subfloor Compatibility and Moisture
What is under the flooring matters as much as the flooring itself. Concrete slabs handle heavy loads but can wick moisture, tape a plastic sheet down for a day, and if condensation forms, use a vapor barrier before installing rubber.
Avoid bare concrete under dropped weights. It cracks, and it transfers shock into your joints. Cheap foam puzzle mats compress and tear under a loaded rack within months.
Step 5: Plan Your Home Gym Cost and Budget for the Long Term
Home gym cost and budget planning is where most people underestimate. The equipment price tag is only part of the total.
Budget for these line items:
- Equipment (rack, bar, plates, bench, dumbbells)
- Flooring and installation
- Anchoring hardware and wall protection
Set aside a small yearly reserve for repairs, replacement parts, and re-coating. Cheap gear costs less upfront but often gets replaced twice; gym-grade equipment costs more once and lasts far longer.
Pricing for our equipment depends on the specific items and setup, so check our site for current quotes rather than guessing at a total.
Step 6: Build a Home Gym Equipment Maintenance Schedule
Home gym equipment maintenance is simple, but skipping it is how good gear dies early. A short routine protects your investment.
- Weekly: Wipe down bars, benches, and handles. Check that bolts and collars are tight.
- Monthly: Inspect welds, cables, and band anchors for wear. Lubricate barbell sleeves lightly.
- Seasonally: Check flooring for lifting edges or cracks. Re-tighten rack hardware.
Moisture, Ventilation, and Corrosion Prevention
Garages and basements trap moisture, and moisture rusts steel. Run a fan or dehumidifier to keep air moving. Wipe sweat off bars and plates after every session, since sweat is the fastest route to corrosion on bare steel and chrome.
Keep equipment off damp concrete. A rubber mat or small riser under the rack feet helps. If your space smells musty, it is holding moisture that will find your barbell.
Step 7: Anchor, Install, and Set Safe Clearances
Installation and anchoring decide whether your gym is safe. Follow the manufacturer's instructions exactly, and do not improvise on wall anchors or rack feet.
Set clearances with these rules:
- Keep at least a bar's length of open space on the loading side.
- Leave a step-back zone in front of the rack.
- Keep storage off the floor in the lifting zone.
A storage plan keeps plates and dumbbells off the floor and out of your way. Wall-mounted or upright storage saves space and reduces trips and falls.
Common Mistakes That Shorten Equipment Lifespan
The same errors show up again and again. Avoid these and your gear will outlast the cheap alternatives by years.
- Skipping the floor check. Overloading a weak floor damages the structure and your equipment.
- Buying on price alone. Thin steel and weak welds fail under real training loads.
- Ignoring moisture. Rust starts quietly and spreads fast in damp garages.
Durability comes down to three habits: measure before you buy, choose gym-grade construction, and maintain what you own. At Powerhouse Fitness Gear, we select equipment from trusted manufacturers known for long-term reliability, so your home gym performs for years.
Building a durable home gym takes planning, and the payoff is equipment that stays solid through years of hard training.
Frequently Asked Questions
How much does it cost to build a durable home gym?
Total home gym cost and budget depends on how much equipment you buy and whether you choose gym-grade or consumer models. A starter setup with a rack, barbell, plates, bench, and flooring costs far less than a full studio-grade build with cardio machines and cable systems. Rubber flooring, anchors, and installation add to the total. Plan for the long-term figure too: gym-grade equipment usually lasts longer and needs fewer replacements, so the cost per year of use is often lower. Check Powerhouse Fitness Gear's website for current pricing on specific items.
What flooring is best for a home gym with heavy equipment?
For heavy weights, rubber is the standard choice. Interlocking rubber tiles or rolled rubber in 8 mm to 15 mm thickness absorb impact and protect the subfloor under a rack and deadlift area. If you drop weights from height, add a dedicated lifting platform with plywood and rubber layers over the rubber floor. Avoid foam mats under barbells; they compress and tear. Concrete floors benefit from a rubber layer for noise reduction and impact absorption, and it also keeps plates and rack feet from sliding.
How much space do you need for a home gym power rack?
Space requirements for a home gym power rack depend on the rack's footprint and the bar. A typical rack is roughly 4 feet wide and 4 to 5 feet deep, but you need clearance for loading plates on each side, usually 2 to 3 feet. Add room in front for a bench and for stepping out during squats. A safe working area is about 8 by 10 feet with at least 8 feet of ceiling height for overhead presses. Measure your room dimensions and mark the footprint with tape before buying.
How do you maintain home gym equipment so it lasts?
Home gym equipment maintenance is mostly simple routine work. Wipe down upholstery after sessions, check and tighten bolts on racks and benches monthly, and inspect cables and straps for fraying. Lubricate barbell sleeves and bushings or bearings as the manufacturer directs, and keep plates and frames dry to prevent corrosion. Run a dehumidifier or fan in humid spaces, and check flooring for compression under rack feet. A written schedule with a monthly and annual checklist keeps small fixes from becoming replacements.


