

Table of Contents
- What Makes a Power Rack Durable for Serious Training
- 11-Gauge Steel Power Rack Construction: Why Steel Gauge Matters
- Power Rack Weight Capacity Requirements for Heavy Lifting
- Best Power Rack Attachments for Strength Training
- Floor Loading and Structural Integrity
- Long-Term Maintenance and Rust Prevention
- Space, Footprint, and Biomechanical Fit
- Frequently Asked Questions
Last Updated: October 2, 2026
What Makes a Power Rack Durable for Serious Training
When you're investing in durable power racks, you're committing to tools that will support your training for years. The difference between a rack that lasts and one that deteriorates comes down to material quality, engineering precision, and how well the manufacturer accounts for the forces your body will impose on it. At Powerhouse Fitness Gear, we focus on equipment that handles serious training loads. The foundation of durability starts with steel gauge, hole spacing consistency, and welding quality, but also depends on proper use and maintenance.
11-Gauge Steel Power Rack Construction: Why Steel Gauge Matters
The gauge of steel in your power rack directly determines how much force it can absorb before deforming. 11-gauge steel is the industry standard for serious training racks because it provides optimal balance between structural rigidity and practical weight. At approximately 0.120 inches thick, 11-gauge resists the flex that thinner gauges (14 or 16-gauge) experience under heavy loads. That flex creates micro-movements that stress welds and connection points. Over hundreds of workouts, those stresses accumulate. An 11-gauge construction with 3x3 tubing maintains geometry under load, the uprights stay vertical, the j-hooks don't shift. Powder coating applied over 11-gauge steel also lasts longer because the underlying material doesn't flex enough to crack the protective finish.
Power Rack Weight Capacity Requirements for Heavy Lifting
Your power rack's weight capacity should exceed the heaviest load you'll ever place on it. Most serious lifters need a rack rated for at least 1,000 pounds, though actual weight is only part of the equation.
Understanding Load Ratings and Safety Margins
When you unrack a barbell, accelerate upward, or catch a failed rep on safety pins, you're creating dynamic forces that spike significantly above the bar weight. Quality durable power racks should have a capacity rating at least 2.5 times your maximum lift. If you squat 500 pounds, you want a rack rated for 1,200 pounds minimum. This safety margin accounts for dynamic forces and gives you confidence the equipment won't fail under real-world conditions. Reputable manufacturers test across multiple scenarios and publish conservative ratings that hold up in practice.
Westside Hole Spacing and Adjustment Flexibility
Westside hole spacing, typically 2 inches apart, has become the standard because it offers fine-tuning without excessive holes that weaken the uprights. Tighter spacing means more adjustment options, if you're 5'6" and lifting with a partner who's 6'2", you can set the rack to match each person's proportions. This adjustability extends the useful life of your rack as your training evolves. Westside spacing balances accessibility with durability by spacing holes far enough apart that the steel between them stays strong.
Best Power Rack Attachments for Strength Training
A bare power rack is functional, but attachments transform it into a complete training station while introducing new structural demands. The right attachments expand what you can do without compromising the durability of the base unit.
J-Cups and Load Distribution
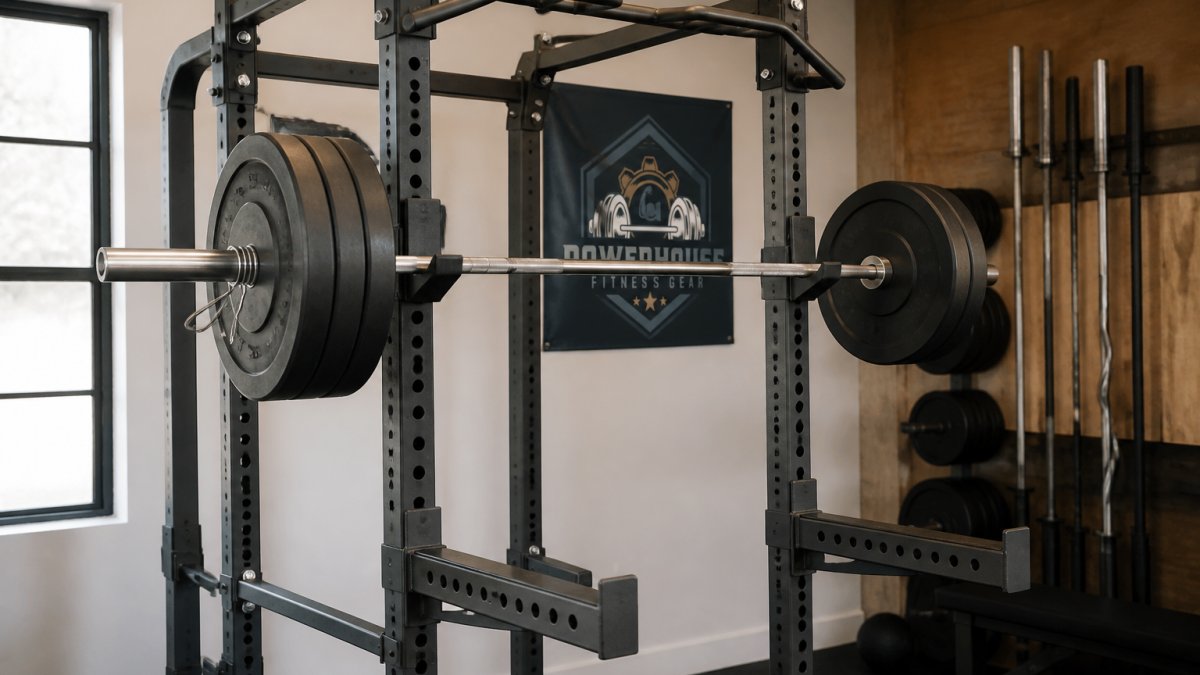
J-cups are the most essential attachment because they determine how safely and predictably you can load the rack. Quality j-cups have knurled or textured contact surfaces that grip the barbell without slipping. A well-designed j-cup cradles the bar in a way that distributes the load evenly across contact points. Look for j-cups with a curved or V-shaped contact surface rather than a flat one, the curve spreads the load. The cup should fit snugly in the hole without excessive play; any movement creates micro-flexing that stresses the connection over thousands of reps. Optimal height is roughly at mid-chest when standing upright, minimizing the moment arm and reducing shear force on the uprights during unracking.
Safety Spotter Arms: Strength and Positioning
Safety spotter arms (also called safety bars or catch arms) catch the barbell if you fail, preventing the weight from crushing you. The arms need to be rated for the full weight of the bar plus whatever load you're lifting. If you miss a lift and the bar falls onto the safety arms, those arms absorb 100% of the load instantaneously. A quality set should be rated for at least 1.5 times your maximum squat or bench press.
Pull-Up Bars and Overhead Clearance
A pull-up bar attached to the top of the uprights adds a second vertical plane for training without requiring additional floor space. Overhead clearance is non-negotiable. A pull-up bar mounted on a standard power rack typically sits 7 to 7.5 feet high. You need at least 6 inches of clearance above your head when hanging from the bar.
Dip Stations and Lateral Load Distribution
A dip station attachment bolts to the uprights and extends outward, providing handles for weighted dips. When you perform a dip, you create a lateral (sideways) force on the uprights where the dip station is mounted. A quality dip station should be bolted at multiple points (typically 4 bolts, 2 on each side) to distribute this lateral load.
Landmine Attachments and Rotational Forces
Landmine attachments mount to the base of the uprights and allow you to insert a barbell at an angle. Rotational forces create unique stresses on the base of the rack. Look for landmine attachments that bolt to the base plate, not just to the uprights. A base-plate attachment distributes the rotational force across a wider area.
Bolted vs. Welded Attachments: The Durability Trade-Off
Bolted connections are stronger than welded ones because you can tighten them as they loosen over time. Every time you use an attachment, bolts experience vibration and stress. Over months and years, they gradually loosen. A bolted attachment allows you to periodically check and re-tighten bolts, maintaining the connection's integrity.
Floor Loading and Structural Integrity
Where you place your power rack matters more than most lifters realize. The floor beneath the rack needs to support not just the equipment's weight, but the concentrated force from your lifts.
Understanding Concentrated Load and Pressure
A loaded power rack can exert 2,000 to 3,000 pounds of force on a footprint of roughly 28 square feet (a typical 7-by-4-foot rack). That's roughly 70 to 100 pounds per square foot. Standard residential flooring is designed to handle distributed loads of about 40 pounds per square foot. A power rack exceeds this significantly.
Assessing Your Floor's Load-Bearing Capacity
Before placing a power rack, assess your floor. Check the joist spacing and size, larger joists and closer spacing mean a stronger floor. Look for existing sag or flex by walking across your floor and feeling for soft spots. Check the subfloor material; plywood is stronger than particle board. Consider the span, the distance between support points affects how much the floor flexes.
Load Distribution with Rubber Mats and Platforms
A rubber mat or weight plate platform under the rack distributes the load across a larger area and absorbs impact. A 3/4-inch-thick rubber mat spreads the rack's weight across its entire surface, reducing pressure on the floor beneath. Thicker mats (1 inch or more) provide better shock absorption. The mat should be at least as large as the rack's footprint, ideally slightly larger.
Moisture and Humidity: The Hidden Threat
If you're training in a basement, check for moisture. Basements are naturally humid and prone to water infiltration. Moisture damages wood joists and accelerates rust on your power rack. Signs of moisture problems include visible water stains, musty smell, mold or mildew, and soft spots in the floor. Address moisture problems before placing a power rack, a dehumidifier is a simple, relatively inexpensive solution that keeps humidity below 50 percent.
Concrete Floors: The Ideal Surface
Concrete is the ideal surface for a power rack. It doesn't flex under load and isn't damaged by moisture. You still want a rubber mat under the rack to protect the concrete from staining and reduce noise and vibration.
Long-Term Maintenance and Rust Prevention
A durable power rack resists rust, but preventive maintenance is simple and takes minimal time. Powder coating is the first line of defense, sealing the steel underneath and preventing moisture from reaching it. When you notice a scratch or chip, clean the area and apply touch-up paint immediately. This prevents exposed steel from oxidizing.
Space, Footprint, and Biomechanical Fit
The dimensions of your power rack determine where it fits and how effectively you can use it. A typical full-size power rack has a footprint of about 7 feet by 4 feet. Half racks use less floor space (roughly 3 feet by 4 feet) but are less stable for exercises requiring a full cage. Full cages provide complete safety because uprights surround you on all sides.
Frequently Asked Questions
What is the minimum steel gauge required for a durable power rack?
11-gauge steel is the industry standard for durable power racks used in serious training. This thickness provides sufficient tensile strength to safely handle heavy loads without flex or deformation. Lighter gauges (14-gauge or thinner) are common in budget equipment but compromise stability and long-term durability. When evaluating a power rack, confirm the tubing gauge specification; 11-gauge or heavier ensures the structural integrity needed for professional-grade training.
How much weight capacity should a serious power rack have?
A serious power rack should have a weight capacity of at least 1,000 pounds to accommodate heavy compound lifts with safety margin. Many commercial-grade racks support 1,500 pounds or more. Your specific requirement depends on your training style: competitive powerlifters should target 1,500+ pounds, while serious home trainers typically need 1,000-1,500 pounds. Always choose a rack rated well above your current maximum lift to account for future strength gains and safety buffer.
What is the difference between a power rack and a half rack for serious training?
A full power rack has four uprights and provides complete safety containment on all sides, making it ideal for heavy, unspotted lifts. A half rack has two uprights and offers more open space but less safety redundancy. For serious training, a full power rack is superior because it allows you to train alone safely with confidence in the safety pins and spotter arms. Half racks work well for experienced lifters with spotters or for space-constrained home gyms, but full racks are the professional standard.
Are bolt-down power racks safer than free-standing racks?
Bolt-down racks are generally safer for serious training because they eliminate any possibility of tipping under asymmetrical loads or during dynamic movements. Free-standing racks rely on footprint and weight distribution for stability, which can shift with heavy unilateral exercises. If you have concrete flooring and plan to lift heavy, bolting down is recommended. Free-standing racks work adequately for lighter training or smaller athletes, but serious lifters benefit from the absolute stability that bolting provides.


